I just returned from cruising on Carnival Glory from Norfolk, Virginia, to Nassau and Freeport in the Bahamas. I used to travel for the joy of eating exotic foods in equally exotic locations, but these days, eating while traveling is a different kind of adventure.
For insurance, I packed food to take with me, such as almond butter packets, organic trail mix, my favorite chocolate bars, instant oatmeal, crackers, and popcorn.
The first day on the ship, we ate dinner in the dining room. I found pasta and steamed vegetables that were fresh, not frozen and precut, so I ordered the pasta without sauce and the vegetables plain. Our waiters brought me olive oil and lemon slices to use as a dressing. I explained my food requests while my husband and our dinner companions enjoyed Indian food, steak and lobster.
The next day, we had purchased an excursion to Atlantis. The cruise directer asked that we not take food off the ship, but I brought unopened almond butter packets. I saw whole fruit in others' bags, so I regretted not packing my trail mix, but I was able to find fresh fruit on the island. Later back on the ship, I started a habit of a predinner of salad, fruit, and a baked potato from the buffet. That night I enjoyed a salad followed by broiled Mahi Mahi with a baked potato and steamed vegetables, which were very good together.
The next day, we explored the capital city of Nassau. We walked to Bay Street and wandered down a side street where a cafe advertising espresso drew in my husband. Since I didn't want coffee, they tempted me with fresh squeezed lemonade with the perfect balance of tartness, sweetness, and refreshing ice water. They assured me that it was made from bottled water and bought ice, and I did not get sick. On our way back, a downpour trapped us into the little indoor mall set up for reboarding the ships. There a vendor with a small frier and pans covered in foil drew my attention. I bought a pork chop, fried plantains, and steamed rice as she enthusiastically described her cooking preparations and how she grew some of her ingredient. Seasoned with salt and pepper, the tender pork melted in my mouth, and the plantains were fried to soft perfection. We enjoyed them sitting on a concrete pillar under the awning waiting for the rain to stop. It will be one of my fondest memories of the trip along with an unexpected encounter with a sea turtle while snorkeling in Freeport.
Toward the end of the trip, the kitchen began to run out of things, so dinner continued to be steamed vegetables and plain pasta. Once I tried two bites of the steak, but it was clearly marinated in something that made me a little sick even though I was assured that it was not seasoned in any way.
Lunch on the ship left me with few options, so on the way back I tried the ship manager's suggestion of speaking with the the maître d' the night before to put in a special request. The restaurant staff made cheesecake especially for me, though they couldn't resist decorating the top with a sauce I couldn't eat. The plain pasta also came with a sauce and sauteed vegetables. But everything was made right by the ever attentive wait staff, while my husband enjoyed the mistake cheesecake.
I was somewhat nervous about eating on the ship, but I got sick only a little and only once, so I think that I did pretty well. Though it wasn't the immersion experience of exotic tastes and smells that I appreciated in my life before food sensitivities, I did enjoy food experiences that are memorable in a positive way.
Monday, November 1, 2010
Tuesday, June 15, 2010
Fizzy Fruit and Berry Smoothie and Ice Pops
It is hot this June in Eastern North Carolina. Pool supplies are selling out at Walmart, and almost every yard in my neighborhood has a pool up already. And it's not even summer yet! I made these two frozen treats to cool off.
Ingredients:
1/4 to 1/2 cup honey, depending on desired sweetness
1 1/2 cups frozen banana chunks
1/2 cup strawberries, caps removed
1/4 cup blueberries
1 cup fresh pineapple chunks
2 cups crushed ice
1/2 cup carbonated water
Directions:
Combine all ingredients in a blender and process until smooth. Drink right away or freeze mixture in popsicle molds.
Thursday, June 10, 2010
Book Review: Sacramental Magic in a Small-Town Cafe by Reinhart
I picked up a copy of Sacramental Magic in a Small-Town Cafe from the Recycled Reader on Tuesday. The author, Peter Reinhart, a member of the Order Christ the Saviour Brotherhood, opened the restaurant, Brother Juniper's Cafe as a form of ministry in the 1960s. I found the idea of opening a restaurant as ministry odd. Reinhart precedes the recipes with stories from the restaurant and from his life. Many of the stories are vivid food experiences that I enjoy reading. I haven't had opportunity to try any of the recipes, but the directions seem very clear and technique is discussed in detail. The chapter that I'm most enthused about is the chapter on making sodas. I make my own strawberry and citrus sodas, but Reinhart has some directions to make ginger ale that I will try this summer. Also, I've asked by husband to try one of the bread recipes. I recommend this book because it is an interesting read even if you don't plan to make the recipes. As I try some out, I'll add to this post how it goes.
Thursday, May 20, 2010
Coconut Cake without Soy or Dairy
This is a crazy, from scratch recipe for a coconut cake that I have been working on.
Ingredients:
1 whole coconut
1/2 cup coconut oil, plus 2/3 cup for making icing and more for greasing pans
1 1/2 cups sugar, plus 2 tablespoons sugar
2 1/4 cups all-purpose flour
1/4 cup cornstarch
2 1/2 teaspoons baking powder
1/8 teaspoon salt
4 large eggs, yokes and whites separated
4 1/2 cups powdered sugar
Special equipment: a blender, cheesecloth, a colander, a hand or stand mixer, wax paper, and two 9-inch round cake pans.
1. Preheat the oven to 350degrees. Crack open your coconut, being careful to catch the coconut water from the center. Watch this YouTube video for instructions: http://www.youtube.com/watch?v=F-gJC2mcebs. Use a paring knife to remove the brown skin that may stick to the coconut flesh. Wash the coconut chunks and grate it on a cheese grater or in a food processor.
2. Toss 1 cup of the shredded coconut with 2 tablespoons of sugar. Set this sweetened shredded coconut aside until after the cake is iced.
3. Make coconut milk. In a blender, combine the coconut water and enough water to make 2 cups of liquid. Then add the remaining shredded coconut not used in the previous step. Blend these together. Line a colander with cheesecloth and place it over a bowl. Pour in the blended mixture. Gather the cheesecloth and squeeze out the liquid into the bowl. This should yield about 3 cups of coconut milk.
4. Use a hand mixer or a stand mixer cream together coconut oil, remaining sugar, and 3 tablespoons of the coconut milk. In a separate bowl, whisk together flour, baking powder, and salt. Stir half of this mixture into the creamed oil and sugar mixture. Then stir in 1/3 cup coconut milk, and then stir in the remaining flour mixture. Stir in egg yolks.
5. In a clean glass or metal bowl, beat egg whites until they form stiff peaks. Note: a clean bowl and mixer must be used for the egg white to stiffen. Stir 1/3 of the egg whites into the batter well. Then gently fold in the remaining egg whites.
6. Cut wax paper circles to match the bottom of your pan. Grease pans, add the wax paper, and grease over the wax paper. Divide the batter between the two pans and bake for 30 to 35 minutes. Allow cakes to partially cool. Then remove them from the pans, remove the wax paper and allow to cool completely.
7. After the cake cools, mix together 2/3 cup coconut oil, 1/3 cup coconut milk, and 4 ½ cups powdered sugar. Add 1 teaspoon of coconut milk at a time until a spreadable consistency is reached.
8. Spread ½ cup of the icing on top of one of the cake rounds and place the second cake round on top of it. Spread the remaining icing on the top and sides of the cake. Press the reserved sweetened shredded coconut onto the top and sides of the cake. Refrigerate until cold before serving.
Update: I can't have this recipe anymore because it is high in sulfur.
Monday, May 17, 2010
Fried Yellow Summer Squash
This weekend I planted five squash plants along with my two tomato plants. I know that they will produce more squash than I want to eat, but I'm preparing for overabundance. Here is the first of many squash recipes made with already-grown squash that I purchased with my plants from the farmer's market.
Ingredients:
5 yellow summer squash
1 onion
4 teaspoons olive oil
Salt and pepper to taste
1. Cut onion in half and then cut into thin strips. Sauté onions on medium heat in a non-stick pan with one teaspoon of olive oil.
2. While the onion is cooking, cut the squash into thin rounds. When onions are soft and starting to brown, put in one third of the squash and one teaspoon of olive oil.
3. When the squash slightly brown on one side, push squash and onions to the outside of the pan and add another third of the squash and a teaspoon of olive oil. Cook until slightly brown and push to the edge of the pan and add remaining squash to center with remaining oil. Sauté until slightly brown. Stir the squash and onions together and cook them until they are dark brown in patches.
Update: I can't eat the onion in this recipe anymore because it is high in sulfur. I substitute an thinly sliced green apple.
Tuesday, May 11, 2010
Strawberry Jam
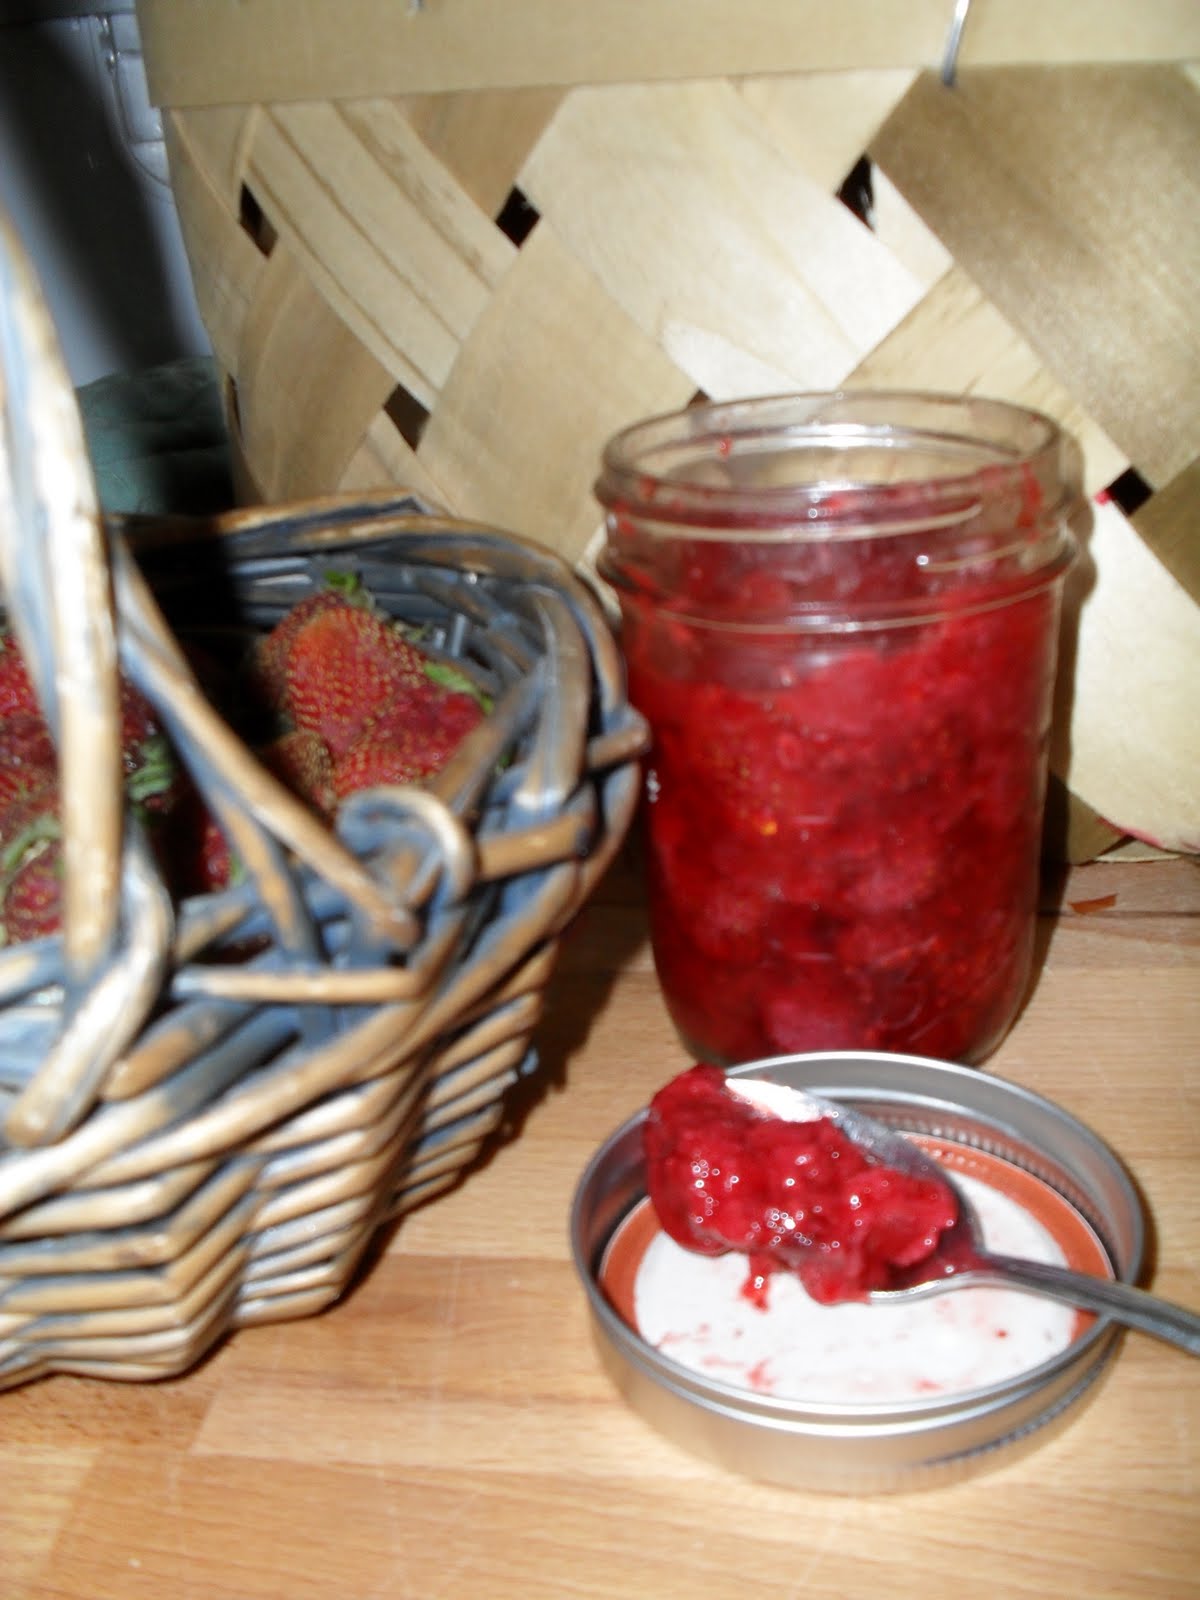
The pectin used to make commercial jams is usually gassed with sulfur dioxide and the juice used to make preserves is usually gassed as well. If I wanted no-sulfite-added preserves, I was going to have to make them myself.
Thus was my motivation to attempt canning for the first time.
I am using a dry pack method. You will need 8 half-pint size canning jars, a candy thermometer, a pot with a lid, and canning rack that fits in your pot (you can buy this as a kit together or borrow one from a relative like I did).
Ingredients:
4 quarts of ripe strawberries
2 1/2 cups sugar
Directions:
1. Sterilize the jars. Put jars in a pot of water and boil for 5 minutes. Follow the directions on your jar package about what to do with the lids. Mine said to not boil the lids. Remove and empty your jars from the boiling and place them on a towel.
2. While your jars are sterilizing, make a strawberry syrup. Heat 2 quarts of mashed or sliced berries and 2 1/2 cups sugar, stirring often, until the mixture reaches 220 degrees or until it thickens and the strawberries mostly dissolve.
3. Next, pack your jars. Cut the caps off of the rest of the strawberries. Pack ripe strawberries into the jars and top with hot syrup. Important note: The jars must still be hot or they will explode. Leave 1/4 to 1/2 inch of empty space at the top of the jar. Run a clean knife along the walls to remove air. Wipe the lip of the jar with a clean damp towel before topping with the lid (My jars directions required me to warm the lids in hot, not boiling water, but check the manufacturer's directions for your lids). Last, screw the lid ring on the jar. Repeat this process for remaining jars.
4. Sterilize your jam if you want it to be shelf stable (otherwise allow jars to cool completely and put them in the refrigerator where they will last 3 months unopened). Your water should still be hot in the pot from sterilizing your jars, so put the jars in your rack and lower it into the water. Add more water so that the jars have at least one inch of water over the lids. Increase the heat to get and maintain a gentle boil. Once the water boils, cover and maintain boil for 10 minutes. If the water level drops, add more boiling water. If boiling stops, bring the water to a boil again and restart the time from the beginning. After 10 minutes, turn off the heat and allow jars to cool enough to handle.
5. Remove the jars from the water and place on a towel. Allow the jars to sit undisturbed for 12 hours. Remove the rings and test lids for seals. If lid is not sealed, store the jar in the refrigerator for up to 3 months. If it is sealed, store the jar in a cool, dark place for up to a year.
Monday, May 10, 2010
Spring Grill for One
I had a good time at the Elizabeth City farmers market this Saturday. I have to work tonight, but I didn't want to wait until tomorrow to eat some of my finds so I made this quick, indulgent, but healthy lunch.
Ingredients:
3 ounces lean steak
5 asparagus spears
3 small (golf ball size) new potatoes
1/2 cup strawberries, caps removed and halved
1 teaspoon olive oil
Salt and pepper to taste
Directions:
Preheat grill on high. Meanwhile wash potatoes and poke with a fork. Microwave potatoes for 4 minutes on high. Snap the woody ends off of the asparagus. Put the steak, asparagus and cooked potatoes on a plate and drizzle with olive oil. Season with salt and pepper.
Put these ingredients on the grill. Cook steak to desired doneness, being careful not to move it around too much. For example, for a well done steak, grill 2-5 minutes this rotate 45 degrees and grill another 2-5 minutes. Flip the meat over and repeat. Even a well done steak should not be moved more than four times.
Remove items from the grill and allow to rest under a loose foil tent for 3 to 5 minutes. Serve with strawberries.
Monday, April 5, 2010
Iced Green Tea Elixir
Last year I developed a slight addiction to a popular brand, bottled green tea beverage flavored with ginseng and honey. I would stop at the 7-Eleven on the way to my teach my night classes and purchase a bottle, and it would energize me through the evening and keep me awake half the night too. Later, I came to believe that I was also having an allergic reaction to this delightful concoction and gave it up. But recently, I have begun experiments to recreate this beverage perfection at home…but decaf this time. This is a less stimulating version of my green tea elixir.
Ingredients:
5 decaf green tea bags (inexpensive variety, individual size)
3 tablespoons good quality honey
Juice of ½ lemon (must be fresh squeezed)
1 quart filtered water
Directions:
1. Heat one cup of the water to no hotter than 120 degrees Fahrenheit. This is important because green tea burns easily and will taste like grass if burnt. If you don’t want to use a thermometer, you can tell if the water is not too hot because you should be able to hold your hand in the water without discomfort for several minutes at or below this temperature. If the water isn’t comfortable for you, it won’t be for the green tea either.
2. Soak the tea bags in the warm water for 3 to 15 minutes. Next, remove the teabags and stir in the honey and lemon juice. Add the remaining filtered water. Chill and serve over ice.
Wednesday, March 24, 2010
Broth and Stock
Today my house is filled with the enticing aroma of chicken, onion, carrot, and spices, but I've spent only about 2 minutes in the kitchen. "A stock is the liquid obtained from simmering together of meat, bones--or fish trimmings--with vegetables, seasonings, and water," writes Julia Child in Volume One of Mastering the art of French Cooking. Homemade broths and stocks increase the flavor and produce a silky mouth feel in many recipes. Stocks usually refer to liquids made with bones and a broth refers to those without bones. Put together anything that you like and have on hand to make a broth or stock. In my recipes, broths and stocks can be used interchangeably. Here is one that I'm cooking right now from leftover bits in my refrigerator. I've also given you my tomato soup recipe (what I had for lunch) that uses the chicken broth.
Chicken Broth
Ingredients:
Chicken carcass (mine is what's left the organic chicken that I cooked in the slow cooker)
1 celery stalk
1 carrot, cut into pieces
1 bunch fresh chives (these are just coming up in the beds around my house)
1 teaspoon black peppercorns
1 cup spinach
Directions:
Put all the ingredients together in a large pot and add enough water to cover ingredients. Bring to a boil and reduce heat. Cover and simmer until the ingredients are thoroughly cooked and look spent and limp, usually for several hours. Train the liquid, and allow it to cool in the refrigerator. Scrape off the fat that solidifies on the cooled broth or stock and discard. Keep broths and stocks in the refrigerator for a week or in the freezer for a year.
Tomato Soup
Ingredients:
1 cup stock
1/2 cup crushed tomatoes
Salt and pepper to taste
Directions:
Combine ingredients and bring to a boil. Note, if your stock is very rich (it congeals solid in the fridge) you may want to dilute it and use1/2 cup stock and 1/2 cup water.
Update: I have to make this without the chives because they are high in sulfur.
Monday, March 22, 2010
What's Cooking Today
Today I made warm butter bean and spinach salad, slow-cooked chicken, olive oil mashed potatoes with wilted spinach gravy, hot cocoa mix, and apple butter.
For lunch I made warm butter bean and spinach salad as a leftover remix of yesterday's butter beans. I added fried onions and spinach to change the flavor and texture, and I enjoyed it with a square of leftover cornbread. See the recipe below.
The organic chicken I got from Soho's, the local organic grocery, cooked up tender and juicy. It just fit into my one-quart slow cooker with a rib of celery, a carrot, and 1/4 cup of pureed tomatoes.
The mashed potatoes were disappointing. I usually don't enjoy russet potatoes mashed, but did not think of this until I was eating them. When mashed, they lack flavor and have a gummy texture. I favor yukon golds for mashed potatoes.
I enjoyed a cup of my hot cocoa (see previous recipe)with my dinner and my apple butter is still simmering in my mini crockpot.
Warm Bean and Spinach Salad: Left-over Remix for the Pork and Butter Beans
I made this recipe after I had made a pot of beans the night before. I ate it with cornbread as a quick light lunch when I was home by myself. Double or quadruple the recipe to serve more people.
Ingredients:
1 tablespoon olive oil
½ onion, sliced thinly
½ cup cooked giant lima beans with cooking liquid
2 cups baby spinach
1 teaspoon grated carrots
1 slice of lime
Saute onion slices in olive oil until dark brown. Add beans with liquid and simmer until hot and thick. Stir in spinach and remove from heat. Continue to stir until spinach welts. Plate and garnish with grated carrots and the juice of the slice of lime.
Sunday, March 21, 2010
Spring is in the Air
We got a new tank for the gas grill yesterday and took advantage of the warm spring weather we are having today. After church, I heated up the giant lima beans that we call butter beans in the South. I cooked them with a pork rib over night in my slow cooker and whipped up a quick cornbread to have with lunch. But for dinner, I wanted something that fit the great weather we have this weekend. So I put two steaks on the grill and served them with baked potatoes and a spinach and citrus salad. Yum!
I have posted the Butter Bean Recipe Below.
Pork and Butter Beans
Ingredients:
1 pound package of dried giant lima beans
1 pork rib or other 4 ounce piece of fresh pork
Salt and pepper to taste
Directions:
1. Soak beans in 4 cups of water overnight or boil for 2 minutes and let soak for 1 hour. Drain water.
2. Place beans, 4 cups of filtered water, pork, and salt and pepper in a slow cooker. Cook 8 hours on low. Serve topped with diced onions if desired. A side of cornbread completes the meal.
Tuesday, January 19, 2010
Rice and Oat Milks
If you have allergies to soy and dairy, you may have experienced a disconcerting feeling from reading the labels of the rice and oat milks sold at the grocery store. Nearly all have many ingredients, and most have soy. Don't despair. It's easy to make your own "milks". First, combine the rice and oats with about three times the amount of water used in the regular recipe. For example, use six cups of water for one cup of uncooked white rice or oats. Bring water with oats or rice to a boil in a large pot. Once the mixture boils, reduce heat so that it barely simmers. Stir frequently and allow to simmer for about three hours (This stage can be completed in a large -slow cooker on low for eight to ten hours). Remove from heat and blend in small batches in your blender or use an immersion blender. For best results, line a colander with cheese cloth and place the colander over a bowl. Strain the mixture through the colander. You can also strain the mixture through a very fine sieve. You can discard the solids after you have collected all of the rice milk or oat milk. You can also flavor the milks with vanilla and sweeten them with sugar or honey if you like.
Try your milk with this hot cocoa recipe:
Hot Cocoa
Ingredients
¾ cup cocoa powder (unsweetened)
¾ cup sugar
3 ounce dark chocolate bar
Combine ingredients in food processor and pulse into a powder. Stir 1 to 2 tablespoons into hot milk or milk substitute.
Note: Plain, good quality dark chocolate usually does not contain milk or nuts, but read labels carefully before selecting a product.
Subscribe to:
Posts (Atom)